Fermenting Chicken Feed
If you saw this video on out TikTok, you may have noticed that there were a lot of questions in the comments. So here I am to answer them for you! Let me break it down for you in a couple of sections
Why am I even fermenting chicken feed?
Before I even got chickens I hyper-fixated on the topic. One of the chicken topics I really dove into was fermenting feed. I found two good reasons to do it
Nutrition - fermented feed is great for the gut health of the chickens, it also helps their little bodies absorb maximum nutrients from the feed.
Budget - you use 1/2 of the amount of feed you would if you feed dry food.
What kind of feed can you ferment?
As far as I can tell, you can ferment any feed: crumble, pellets, scratch, grower feed, layer feed, homemade feed. I am using the Whole Grain Layer Feed from Mile4 (see it here). update: I WAS using the feed from Mile4, since then I found a local mill that I can purchase much larger quantities from. I loved Mile4 and if you do not have a local mill and have a small flock, I defiantly recommend it. You can learn more about different types of chicken feed in the Chicken Nutrition blog post.
How much feed should I use for my flock?
Based on the information I collected from various sources you’ll use approx 1/4 cup of food per bird. I suggest you start with using half of your normal dry measurement and then make adjustments as you observe the habits of your flock.
How do you set up the fermenting system?
Here is my system:
What you need : 3 buckets (size depends on the amount of feed you need for each day) :: Feed of your choice :: Water
Day 1: in the first bucket, measure out one days worth of food (remember you are using half the amount you would normally use dry). Add enough water to cover the feed generously, mix well. Cover and set in a safe place where it won’t be disturbed.
Day 2: open bucket number 1, if it needed, add more water. Repeat the day 1 process with bucket number 2. Stack bucket number 2 under number 1
Day 3: repeat: check on bucket one and two, add water if needed, give them a swirl and but back number 1 on top of number 2. prepare bucket number 3 the same way you did one and two. Place it on the bottom of the stack.
Day 4: Your fermented chicken feed is ready! Today you will be feeding bucket number 1. You should observe the the feed has absorbed the water, it is not too pasty but it’s not too watery (getting this consistency will take some trial and error). You will also observe that the feed is bubbly…that’s the fermenting at work! Dump the bucket into your feed bowl. I also add fodder (sprouted seeds) and any appropriate left overs from my fridge or fruit from the fruit bowl that is a little past its prime. Rinse out bucket number 1 and replenish using step one, place it under bucket 3. - REPEAT EVERY DAY!Is this the only food your flock is getting every day?
No. This is their breakfast. I usually get this meal into the coop before I take the kids to school. When I get back to the house I will open the run so they can free range in the backyard all day. In addition to the yard, they have their own chicken garden where I am growing squash, sunflowers corn and a collection of herbs. I also regularly scatter seeds to sprout for grazing. At dinner time I toss scratch (as well as dried worms and oyster shells) into the sandy floor of the coop along with any veggie scraps I have from dinner prep. If I don’t have any scraps for them I’ll give them treats like half a cabbage, apples or chopped kale. When the girls are laying (in a couple months) I will also feed their shells back to them. Once the veggie garden is in full swing this summer, they will have regular fresh snacks.
How do you grow the sprouts?
Growing the sprouts (aka fodder) is very easy. There are a lot of systems available, you will need to shop around and choose they system that will produce the appropriate amount of fodder for your flock. Here is the link to the system that is featured in the original TikTok video. SPROUT TRAYS
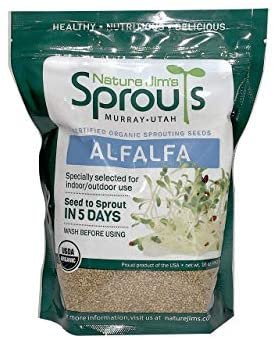
In the video I am preparing these ALFALFA SEEDS, however your sprout options are endless. You can really choose any kind you want, try different ones to see what your girls will like best! Note: I did try broccoli seeds in these trays and had trouble with them. This particular product does come with instructions but essentially you will follow a similar process to the fermented feed: prepare one tray each day, always put the newest tray on the bottom. water twice a day.
I started with one set of trays but did find that the sprouts were ready in 4 days, so I purchased a second set of trays and run an 8 day rotation.
Can you provide links to the specific things you purchased to create your system
Sure! Keep in mind, that you will need to adjust your system to fit your birds. I currently have a flock of 6 young girls so my system is small. I made this the way it is so that it fits on my counter top for easy access Here is the summary of items affiliate links


